Module layout & Fields
- Home
- Zaris Features
- Module layout & Fields
Analysis Of Module Layouts & Fields In Zaris
Each module in Zaris CRM contains essential information organized into predefined blocks and fields. The Module layout & Fields feature allows administrators to fully customize this structure including creating new custom fields, modifying existing ones, adjusting their order, and moving fields within or between blocks. You can design fields that are available system-wide for all users or restrict their visibility to specific user groups by configuring and applying profiles.
Customizing Module layout & Fields
The edit module & fields can be navigated in two ways:
Using Settings
- Go to the CRM Settings.
- In settings, choose the Module Management
- Then click on Module Layouts & Fields
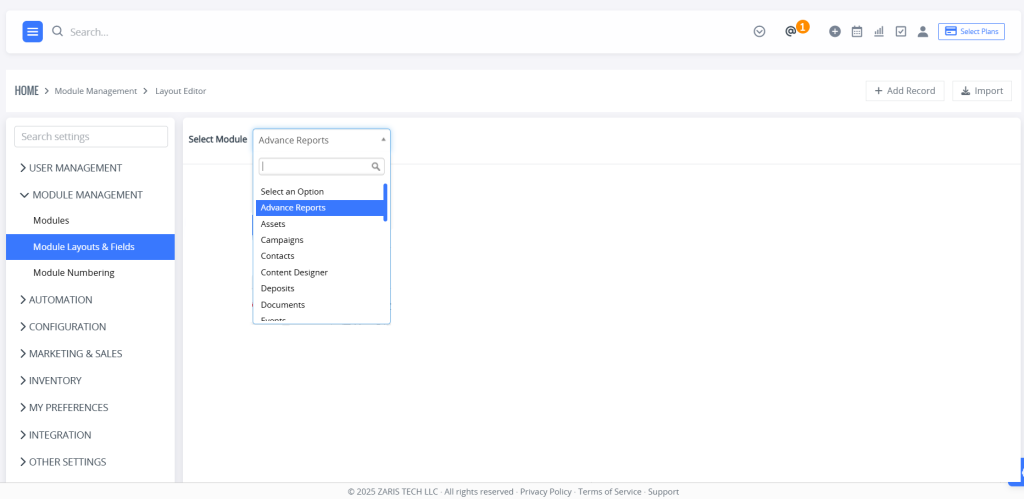
- Select your desired module from the drop-down.
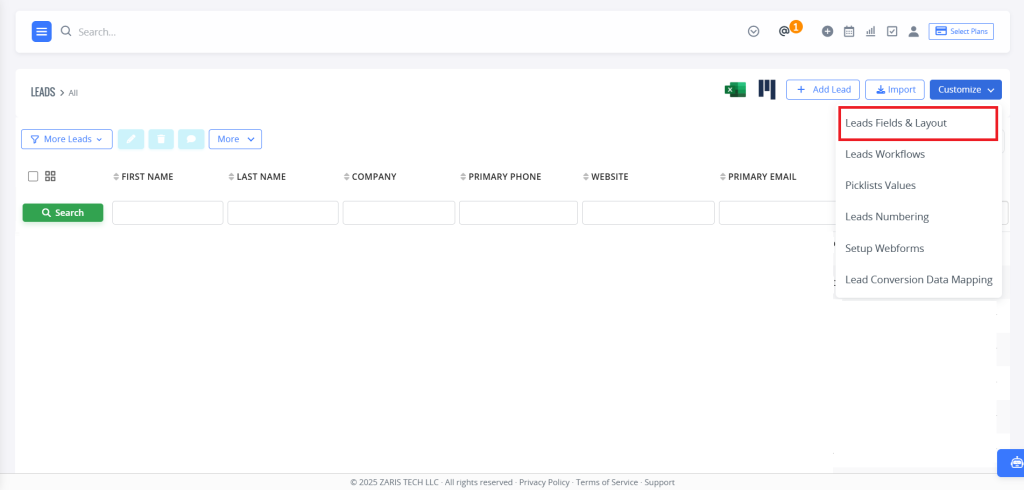
Or by Using the Corresponding Module:
- Choose your desired module e.g. Organizations, Lead, Documents etc
- Then select the desired record in the selected module
- A “Customize” icon will appear in the top right corner.
- Click on the drop-down menu and select Module Layouts & Fields.
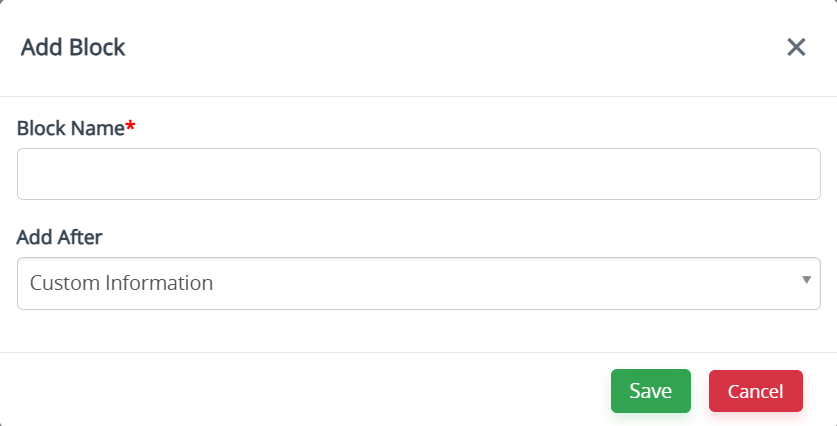
How to create a Custom Block
Zaris gives you options to choose a ready-made block or to create your own. And it’s simple:
- Click on the Add Block button.
- It will pop-up a box where you provide relevant information in the Block Name. Also you will be asked where to put the new custom block through Add After drop-down.
- Click Save.
Creating Custom Fields in Zaris CRM
Zaris CRM allows administrators to create custom fields tailored to specific business needs, in addition to the standard fields already available in each module.
To create a new custom field, follow these steps:
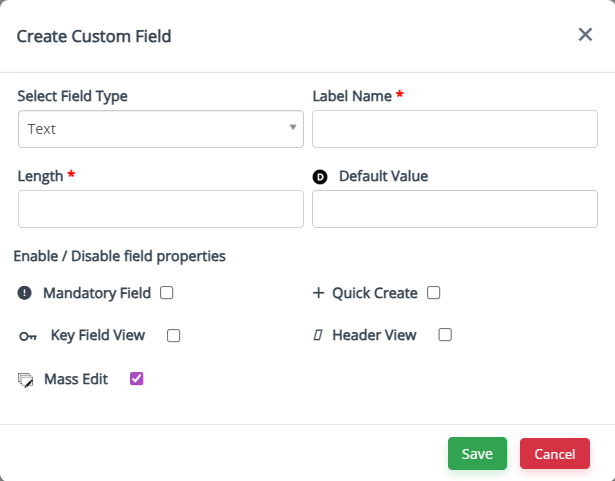
Click “Add Custom Field” located at the top-right of the screen.
A pop-up will appear choose “Create Custom Field.”
A list of available field types will be displayed. The menu is searchable select the appropriate Field Type from the dropdown list.
Provide the Field Label, Length, and any additional information (such as Picklist Values if applicable).
Tip: You can manage dependencies between picklist values using the Picklist Dependency settings.
Set the Default Value for the new field.
Use the Checkbox Options to configure field properties (e.g., Mandatory, Active, or Visible in List View).
Finally, click Save to create and add the custom field to the selected module.
This process ensures that Zaris CRM fields are perfectly aligned with your data requirements while maintaining flexibility for future customization.
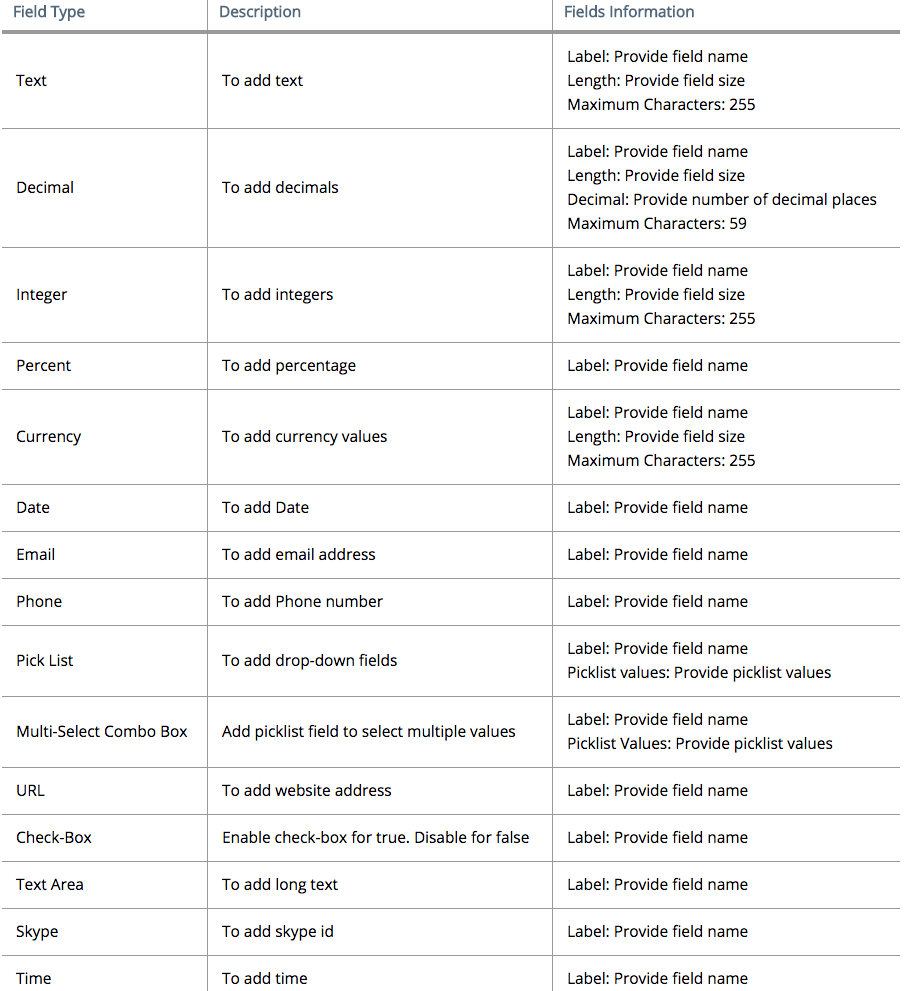
Custom Fields
Zaris offers various types of custom fields, allowing you to tailor data entry based on your specific business needs.
Organize Fields to Your Preference
Zaris allows you to arrange fields based on your workflow, usage frequency, or priority helping you work faster and more efficiently.
To reorder fields:
Go to the Layout & Fields Editor of your selected module.
Click and drag the field to your desired position (you can move fields both vertically and horizontally).
Click Save Layout at the top-right corner to apply your changes.

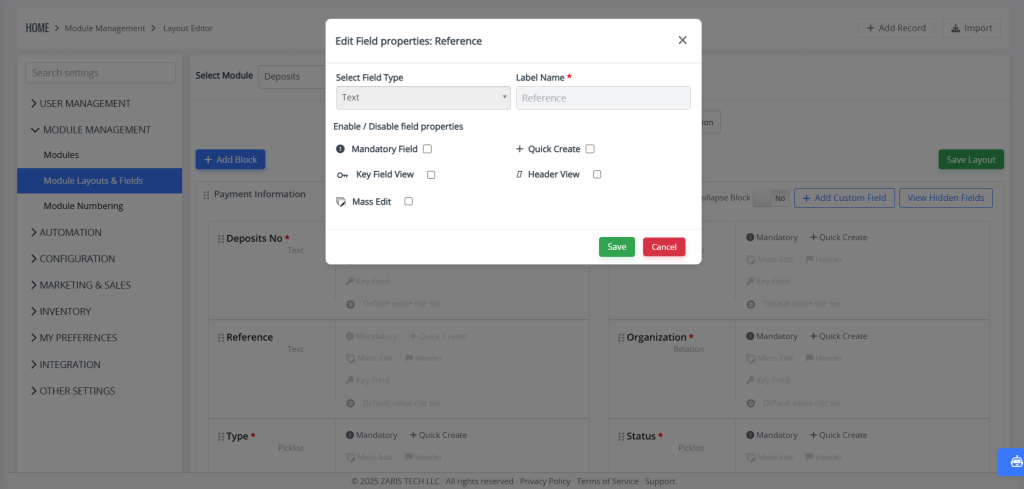
Modifying Field Elements
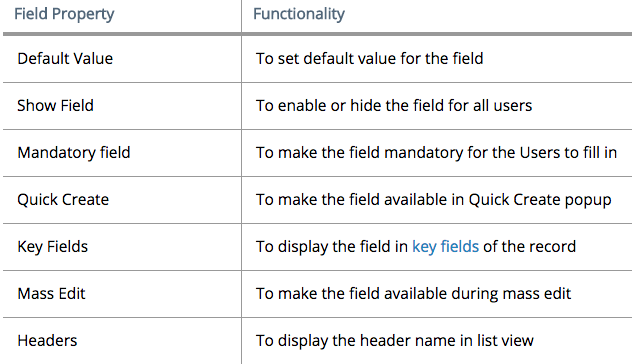
Zaris allows you to easily configure the basic preferences of any field based on your requirements.
To modify a field:
Click the pencil icon next to the field you want to edit.
A pop-up will appear showing a set of configuration options (such as label, default value, or visibility).
Adjust the settings as needed.
Click Save to apply your changes.
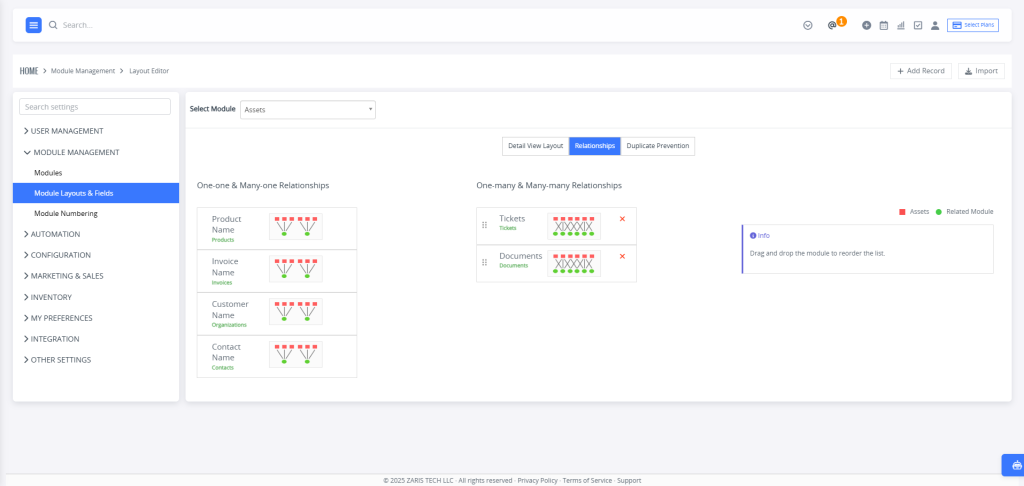
Relationships
In Zaris CRM, two modules can be interlinked to create meaningful connections between related records. These relationships help users access linked data easily and improve workflow efficiency.
Administrators can also create new relationships in addition to the default ones provided by the system.
To create or manage relationships:
Go to Settings → Module Manager → Module Layouts and Fields.
Select the desired module.
Click on the Relationships tab to view, add, or manage relationships between modules.
Zaris CRM supports four types of relationships that define how data is connected between different modules, enabling better organization and information flow across records.
1. One-to-One: A single record in one module is linked to only one record in another module (e.g., a Lead connected to one Opportunity).
2. One-to-Many: One record in the primary module can be linked to multiple records in the related module (e.g., a single Lead linked to several Opportunities).
3. Many-to-One: Multiple records in the primary module can connect to a single record in the related module (e.g., multiple Leads associated with one Opportunity).
4. Many-to-Many: Records in both modules can be linked to multiple records in the other, allowing flexible and comprehensive data relationships (e.g., a Lead linked to many Opportunities and vice versa).